HP Sprocket Plus Printers - Setting up the Printer

This document is for HP Sprocket Plus Printers and the HP sprocket app for Android mobile and Apple iOS devices.
To set up a printer for the first time, remove the printer and all packing materials from the box, install the HP sprocket app, load HP Sprocket Plus Photo Paper, and then calibrate the printer.

Step 1: Remove the printer from the box

Remove the printer from the box, remove any plastic packing material from the printer, and then recycle the packing materials.
Removing the printer from the box

Step 2: Pair the printer and mobile device

Install the HP sprocket app on your mobile device, and then pair your mobile device to the printer using a Bluetooth connection. The app is required to connect the printer and print photos from your mobile device.
  • Go to the HP Sprocket (in English) homepage, and then follow the on-screen instructions to download and install the app.
  • After the app installs, turn on the printer by holding the Power button until the Status Indicator light above the output slot is solid and white.
    Turning on the printer
  • On your mobile device, open the Bluetooth settings menu, and then make sure Bluetooth is enabled.
  • Open the HP sprocket app.
  • If a Welcome screen displays, tap the setup option, and then follow the on-screen instructions.
  • Tap the Menu icon , tap sprocket, and then tap Manage Printers.
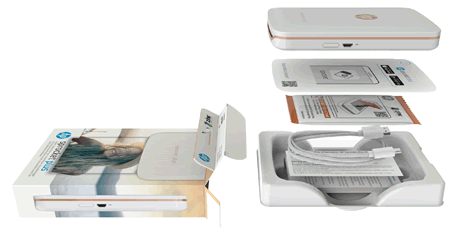
    A list of available Sprockets displays.
    • If your printer displays, the printer is connected.
    • If your printer does not display, tap Add New Printer, and then tap your printer.

Step 3: Load HP Sprocket Plus Photo Paper

Load 5.8 x 8.7 cm (2.3 x 3.4 in) HP Sprocket Plus Photo Paper into the input tray.
  • Turn off the printer.
  • Remove the paper cover by sliding it away from the output slot, and then set it aside.
      Removing the paper cover
    1. Slide the paper cover
    2. Remove the paper cover
  • Load up to 10 sheets of HP Sprocket Plus Photo Paper with the orange Print Quality Card (formerly Smartsheet). Make sure the orange card is on the bottom of the stack with the barcode facing down, and the photo paper with the HP logos facing down.
    note:
    Keep the orange card until you are done with all 10 sheets, and then discard it.
    Loading HP Sprocket Plus Photo Paper
  • Align the paper cover with the tracks on the outside of the printer, and then slide the paper cover toward the output slot until it is firmly seated.
  • Turn on the printer.
  • Step 4: Calibrate the printer

    Send a print job with the HP sprocket app to calibrate the printer with the orange card.
    • On your mobile device, open the HP sprocket app.
    • From the home screen, select the photo you want to print.
      The image preview screen displays.
    • Tap Edit or the Edit icon to adjust the photo appearance, add text or stickers, and apply filters.
    • Tap the Checkmark to save any changes, and then tap the Print icon .
      The printer calibrates using the colored card.
    • Wait until the Sprocket is idle and silent, and then remove the colored card.
      After calibration completes, your photo prints.
    For more information, go to Using the HP Sprocket App.
    Please help us improve by providing feedback on your experience with the document.